*If you're returning from a break in setting up your tournament's website:
1. Go to your tournament's URL and log in.
2. Click Administration
This is where we'll post the important information regarding your tournament. Make sure you consider anything coaches need to know in order to register for and attend your tournament, such as events offered, fees charged, directions to the tournament's location, and any special rules you intend to enforce. If you're still in the planning phases, click here to see a list of questions you'll need to ask yourself when planning a successful tournament.
EDIT A PAGE
There are two different ways to go about the process of editing the "content" for each of your
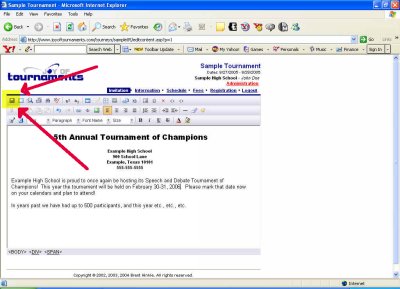
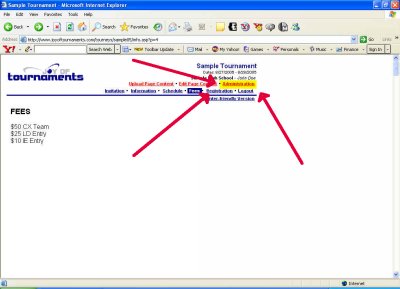
information pages. From the top of your Administration page,
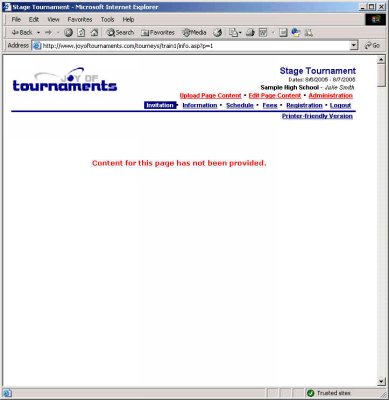
click on the link labeled Preview Website (or it may be labeled View Website).
Next, click on one of the page titles (Invitation in this example.)
You may use the Edit Page Content or Upload Page Content links at the top of the page to provide the appropriate content. Most users will probably want to use the Edit Page Content link. If you are familiar with HTML and know how to create web pages, you may do that in whatever application that you want to use (e.g. Dreamweaver, Front Page, etc.). Once you have the pages created, you can then upload the pages directly to the website via the Upload Page Content. For those of you not as familiar with HTML, the Edit Page Content link is built just for you.
When you click on the Edit Page Content link, you should
see a page that reminds you of your normal word processor you use on your computer.
Not only does it look like your word processor, it works like it too.
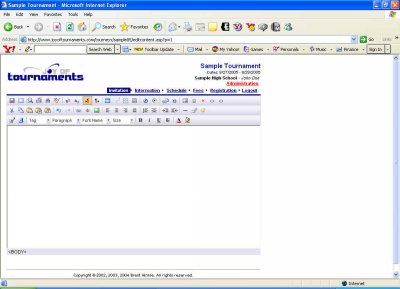
Simply click inside the big white text area, and you're ready to type the first page you wish to display for schools interested in your tournament. If you've already sent out packets inviting teams to your tournament, feel free to re-type word for word what you sent out to the schools. However, we'll also look at how you can cut and paste from existing documents saved on your computer.
As you slowly scroll with your mouse over the editing buttons at the top of the page you'll see each button's title appear, telling you what that button does. It is recommended that you use only functions with which you're already familiar. For example, if you're able to change the font using Microsoft Word, then you can easily do that here.
Here is a brief description of some of the buttons:
Save |  | saves your work--VERY IMPORTANT! |
Full Screen |  | gives you more room to work on your document |
Check Spelling |  | checks the spelling of the document you're editing |
Superscript |  | causes any highlighted text to become a superscript |
Subscript |  | causes any highlighted text to become a subscript |
Table |  | creates a table within the document |
Paste from Word* |  | pastes text into editor from Word document |
Justify Left |  | moves highlighted text tlefte left |
Justify Center |  | centers highlighted text |
Justify Right |  | moves highlighted text to the right |
Bold |  | causes highlighted text to be bold |
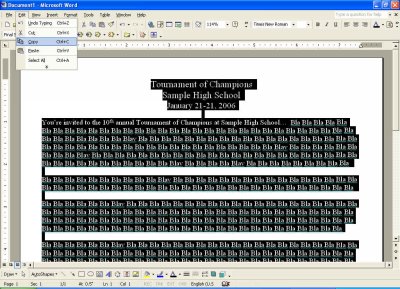
*One button that may be of special importance to you is the Paste from Word button. If you typically use Microsoft Word at school to type the letters you send out to other coaches, this button can be very helpful in this step of the process because you've probably already typed up all the information you need to post here.
To Copy and Paste from a Word document, highlight the text in Word that you wish to post on the first page of your website. (For example, if the first page is the Invitation, you'll open the invitation you sent out to the coaches and high light the text.) Click Edit then Copy there in your Word document.
Paste from Word button.
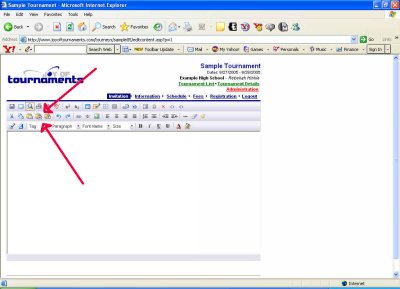
This will open up the following smaller window, which tells you to paste by hitting Control and V on your keyboard at the same time.
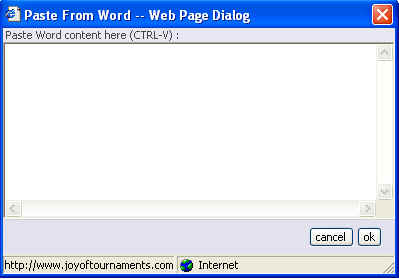
At this time your text will appear in the window, and you may click OK in the bottom right corner of that window. You should now see your text in that original editor. At this point, you may wish to further edit the text you've just pasted.
Perhaps the most important piece of information to remember is to click on SAVE after you've finished typing and editing your document. SAVE is located in the upper left corner of the editor.
When you click Save you'll be shown a preview of how your page will look when posted on the website. At this point if you want to edit the document further, click Edit Page Content near the top of the page. Remember that although you're looking at a preview of how your web page will appear to the public, anything in red will not be visible to the public.
You will then be returned to the document editor, where you'll repeat the previous steps until you're satisfied with your first document. IMPORTANT NOTE: After editing your page a second time and clicking SAVE your page won't immediately reflect the changes you've made. At the top of your keyboard, press the F5 key, and your newest changes will then appear.
Once you're satisfied with that first page, you're ready to move on to the next page of information. Click on the title of the next page.
Now you'll see a rather empty page. That's because you've not yet entered the contents of that next page. Click on Edit Page Content near the top of the screen, and you'll be taken to a blank page editor, where you can enter the next page's information. Each additional page works just like the first one. Here's a brief reminder of the steps:
1. Type and edit page content.
2. CLICK SAVE.
3. Proofread preview.
4. Edit if needed by clicking Edit Page Content.
5. CLICK SAVE each time you edit.
6. Press F5 to update with changes.
7. Return to step 4 if needed.
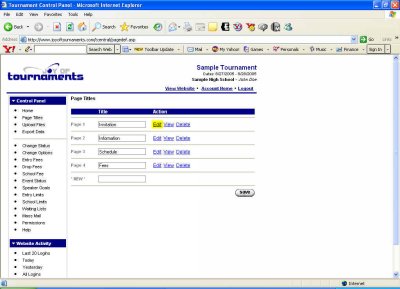
Earlier on this page, we mentioned that there were two ways to go about editing the content for your pages. So far, we've only discussed clicking on the Edit Page Content links that appear at the top of each information page. You may also click on your Administration link and then select Page Titles from the left-hand menu.
You'll then see a listing of your information pages with options to the side that say Edit View Delete Upload.
When you've edited each of your tournament's information pages and have proofread the final one, we'll move on to the next step in the process. In order to do that, click Administration at the top right corner of the page.
The next step is to Enter Judge Quotas.